0


React Native is one of the popular and powerful mobile application programming languages to develop applications with fast speed, easy to improve, easy to maintain. Therefore, mastering the knowledge of this programming language will be important to start your career.
# Start React Native from zero # Use React Native yourself # Understand how it works # Long-term support for students
React Native is a powerful framework that helps developers create mobile apps for iOS and Android with just one codebase. The course is designed from basic to advanced, suitable for beginners.
Students learn from setting up the Expo environment, project structure, to building real applications. After the course, you will have enough knowledge to deploy a complete product and confidently apply for a mobile programming position.
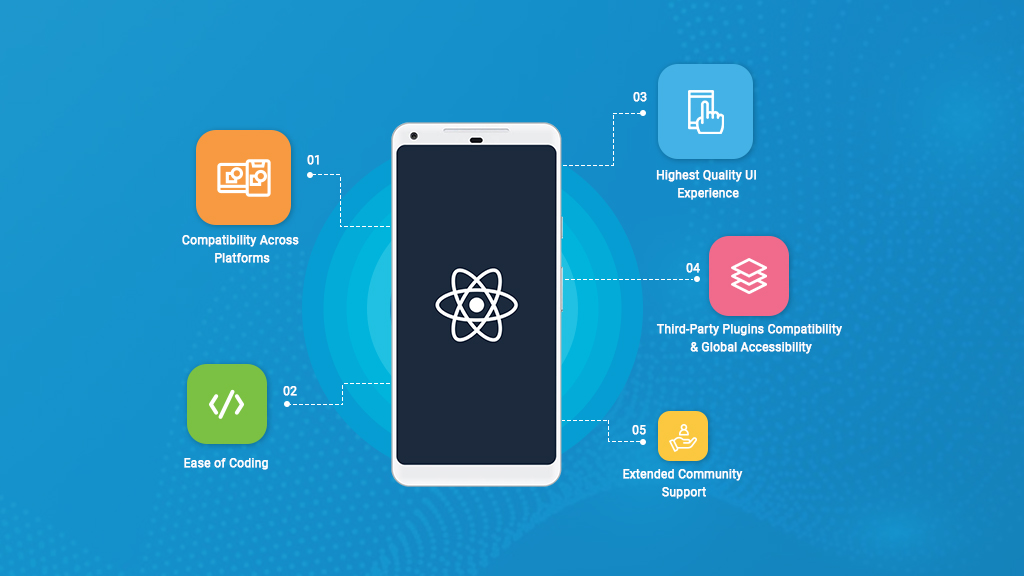
React Native saves time and money when developing cross-platform applications. Many large technology companies such as Facebook, Instagram, Shopee have chosen React Native for their products.
Mastering React Native means you have the opportunity to participate in the potential mobile application development market, learn quickly and open up many job opportunities.
The course is suitable for IT students, web programmers who want to switch to mobile, freelance app developers and businesses who want to build their own apps.
Even if you don't have a solid foundation, the course still provides detailed instructions, many practical examples, is easy to access and can be applied immediately to personal projects or work.

The basics section focuses on the programming environment with Expo, Navigation, AsyncStorage, event handling, and user interface design.
Students will practice right away with small applications such as To-do App, Simple Chat, thereby mastering core knowledge and confidently developing basic applications.
Students are guided to integrate API, manage data, use BLEManager library, GiftedChat, VNPAY payment and optimize application performance.
There is also a part of deploying the app to the App Store and Google Play. After the advanced part, you can develop a real app, ready to take on projects or go to work right away.
The learning path is logically built: from basic knowledge to advanced application, combining theory and practice in parallel.
Students complete mini projects and a final project while studying. This is the most effective way to learn to remember for a long time and have a showcase product for employers.
Compared to Flutter or Kotlin, React Native has the advantage of a large community, rich documentation and easy access for people who know ReactJS.
It is a framework that balances development speed, performance, and scalability. Learning React Native gives you a huge advantage in cross-platform app development.
The mobile programming market is growing rapidly. The demand for recruiting React Native programmers is very high at startups, agencies and technology corporations.
After studying, you can apply for a Mobile Developer position, work as a freelancer or start your own business with your own products. This is a skill that brings good income and long-term opportunities.
React Native is accessible for people who already know JavaScript or ReactJS. For beginners, the course is designed to be friendly, with step-by-step instructions.
Complex concepts are explained with visual examples. Learners can quickly progress and develop their own applications with just a little practice.


In addition to the curriculum, students have access to rich, continuously updated materials from the international community.
The React Native ecosystem is vast with thousands of libraries, forums, and support groups. Learners will never be “stuck” when developing real applications.
This section will give you the most comprehensive overview of React Native, from its definition, origin, core operating principles, to its clear advantages and disadvantages. You will understand why React Native has become a top choice for mobile app development and how it differs from other popular technologies.
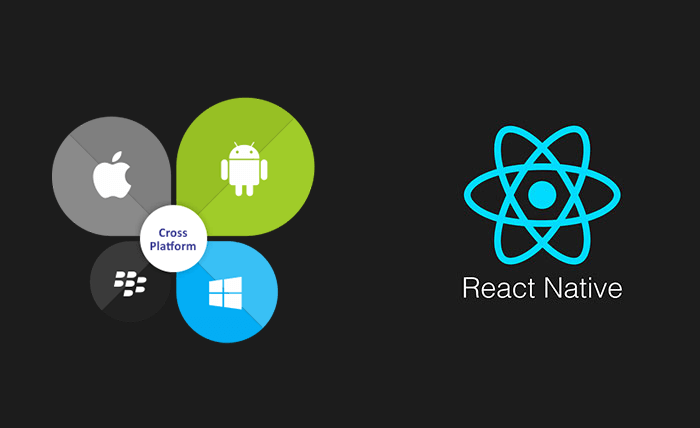
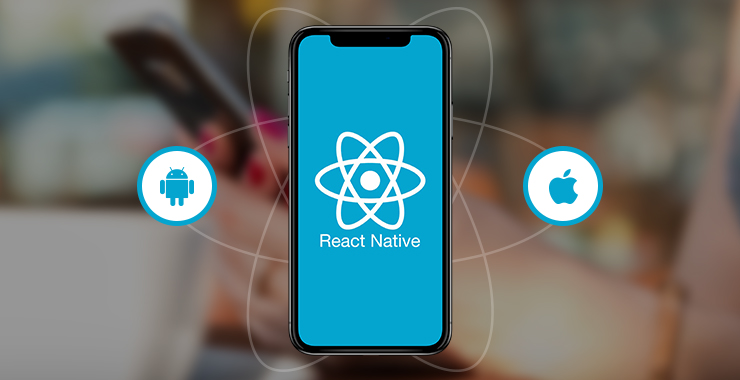
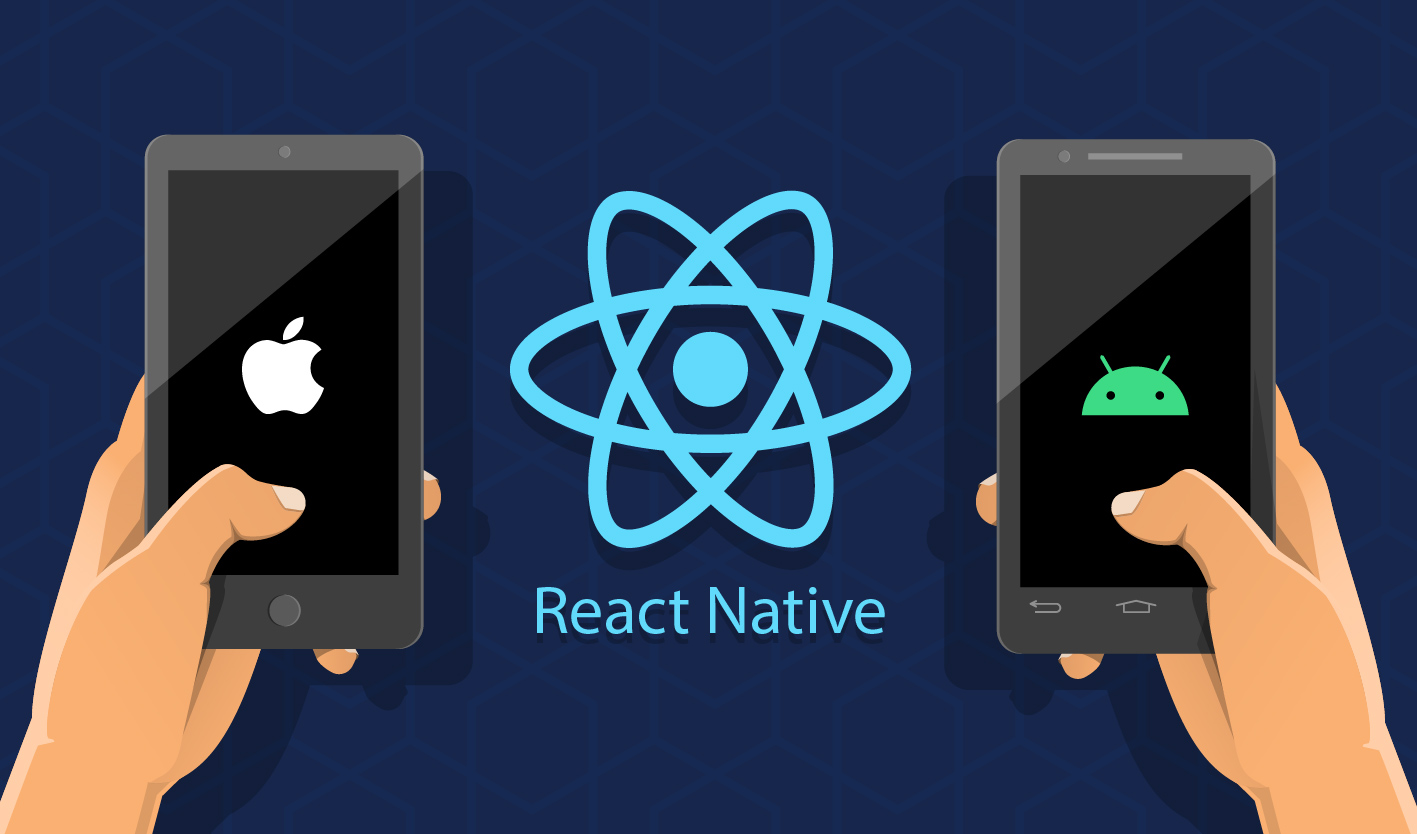
React Native is an open source framework developed by Facebook (now Meta) that allows developers to build mobile apps for both iOS and Android from a single codebase. The primary language used in React Native is JavaScript, along with JSX (JavaScript XML) syntax – an extended syntax that allows writing code that looks like HTML within JavaScript.
React Native’s roots can be traced back to its “sibling” ReactJS, a JavaScript library for building user interfaces (UI) for web applications. Recognizing the success and efficiency of ReactJS’s component-based development model, Facebook sought to apply the same philosophy to mobile application development. The result was React Native, bringing the power of React to the mobile world. This means that if you’re already familiar with ReactJS, transitioning to React Native programming will be much easier.
React Native's famous slogan is "Learn once, write anywhere". This reflects exactly how it works. Instead of compiling JavaScript code into native code for each platform (like some other frameworks), React Native works based on a "Bridge".
When your app is running, your JavaScript code runs on a separate thread (JS Thread). When it needs to render the UI or access device features (like camera, GPS), the JavaScript code sends asynchronous messages via the Bridge to the native thread (Native Thread). The native thread interprets these messages and uses the native UI components of the operating system (e.g. UIView on iOS, View on Android) to display them on the screen.
This mechanism offers two major benefits:
Smooth user experience: Since the interface is rendered using real native components, users will feel "real" and familiar as if they were using an application written in the machine's native language.
High performance: Logic-heavy tasks are handled on the JS thread, without affecting the native UI thread, making the application more responsive.
To better understand where React Native stands, it is important to compare it with other technologies.
React Native vs ReactJS: This is the most frequently asked question. ReactJS is a library for building user interfaces for the web, using virtual HTML tags like
React Native vs Flutter: Flutter is the most direct competitor of React Native, developed by Google.
Language: React Native uses JavaScript/TypeScript, while Flutter uses Dart.
Architecture: React Native uses Bridge to communicate with the native platform. Flutter draws its entire interface using the Skia graphics engine, without using the native UI components of the operating system. This gives Flutter very high graphics performance and an absolutely consistent interface across all devices, but can sometimes create a "strange" feeling compared to native applications.
React Native and Native Programming (Swift/Kotlin):
Performance: Native programming is always the most efficient because the code is written and optimized directly for the operating system. React Native, while very efficient, has a middle layer called Bridge, so it can be slower for extremely complex or graphically demanding tasks.
Time and cost: This is the outstanding advantage of React Native. Instead of having to build and maintain two separate teams for iOS and Android, you only need one JavaScript team to develop for both platforms, saving a lot of time and cost.
You will receive a detailed, step-by-step roadmap to conquer React Native. This scientifically designed React Native learning path starts from the essential foundational knowledge, to confidently building, managing state, optimizing, and deploying a complete application to the market.
This is the most important step and is often overlooked by many people. React Native is not a standalone technology, it is built on top of JavaScript and React. If you try to learn React Native without a solid foundation, you will have a hard time.
JavaScript (ES6+): You need to have a solid grasp of modern JavaScript concepts, including:
Variables and scope: let , const , var .
Data types: Array , Object .
Function: Arrow functions ( => ).
Asynchronous programming: Promises , async/await .
Destructuring, Spread/Rest operators.
Modules: import , export .
ReactJS: After mastering JavaScript, you need to learn the core concepts of React. Here is the most effective roadmap to learn React:
JSX: Syntax for writing UI.
Components: Functional Components and Class Components (nowadays Functional Components are more popular).
Props: How to pass data from parent component to child.
State: How to manage the internal state of a component.
Lifecycle Methods (in Class Components) and React Hooks (in Functional Components) like useState , useEffect , useContext .
Once you have the foundation, you can start diving into the world of React Native.
Understanding Development Environments: Learn the differences between the two main approaches:
React Native CLI (Command Line Interface): Provides full control over the project, allowing you to write custom native code. Suitable for complex projects.
Expo: A set of tools and services built on React Native that simplifies development. No need to install Android Studio or Xcode. Great for beginners and projects that don't require deep integration with native code.
Environment Setup: Based on your choice, manually setup the environment following the detailed instructions and create your first project.
This is the stage where you will learn how to turn your ideas into real interfaces on your phone.
Core Components: Get familiar with the most basic components like , ,
, , .
Styling: Learn how to style components using the StyleSheet API, similar to CSS but with JavaScript syntax. Master Flexbox to build flexible, responsive layouts across multiple screen sizes.
Lists: Learn how to display data lists efficiently using and .
Navigation: This is an essential part of every app. Learn how to use the most popular library React Navigation to create navigation flows between screens, including Stack Navigator, Tab Navigator ( createMaterialTopTabNavigator ), and Drawer Navigator.
As applications become complex, managing state and data becomes challenging.
State Management: Explore global state management solutions such as:
React Context: React's built-in solution, suitable for small and medium sized applications.
Redux / Redux Toolkit: The most popular and powerful state management library, suitable for large applications.
Other solutions like MobX, Zustand.
Working with APIs: Learn how to call APIs from the server using fetch API or libraries like axios to fetch and send data.
Local Storage: Master how to store data on user devices with AsyncStorage , a simple and efficient key-value storage solution.
Once you have built your app, the final step is to make sure it works smoothly and get it into the hands of your users.
Performance: Learn optimization techniques like useMemo , useCallback , React.memo to avoid unnecessary re-rendering, optimize FlatList performance, and debug performance issues with Flipper.
Deployment: Learn the process of building an app into an .apk (Android) and .ipa (iOS) file and the steps to put your app on the Google Play Store and Apple App Store.
Summary: This section provides a detailed hands-on guide to help you set up your own development environment and successfully run your first "Hello World" project. We will clearly analyze two popular methods, Expo and React Native CLI, to help you make the most appropriate choice and start your coding journey.
Before you get started, you need to make an important decision: should you use Expo or React Native CLI . These are the two main paths to developing React Native apps, each with its own pros and cons.
Expo (Recommended for beginners):
Advantage:
Quick setup: You only need to install Node.js and Expo CLI. No need to install Android Studio or Xcode (which is very large).
Easy Development: You can run the app directly on a real phone by scanning a QR code via the Expo Go app.
Built-in APIs: Expo provides a set of optimized and tested libraries (SDKs), making it easy to access cameras, sensors, push notifications...
Disadvantages:
Limitations: You cannot use React Native libraries that require native linking that are not included in the Expo SDK. Although Expo now has an expo dev client to help somewhat, there are still certain limitations.
Larger app size: Apps built with Expo are often slightly larger in size initially.
React Native CLI (For professional and complex projects):
Advantage:
Maximum flexibility: You have full control over the project, can integrate any native library and write your own native modules if needed.
Optimize app size: You only pack what is needed, making the final app lighter.
Disadvantages:
Complicated setup: Requires installation and configuration of Android Studio (for Android) and Xcode (for iOS), which is a time-consuming and error-prone process.
Depends on virtual machine/real device: Need to run virtual machine (emulator/simulator) or connect real device via cable for development.
Conclusion: If you are new to React Native or working on a not-so-complex project, start with Expo . It will help you focus on learning the logic of React Native without getting distracted by environment configuration issues.
Request:
Install Node.js (LTS version).
Install the Expo Go app on your Android or iOS phone.
Steps to follow:
Install Expo CLI: Open Terminal (on macOS/Linux) or Command Prompt/PowerShell (on Windows) and run the following command:
Create new project:
When prompted, select template blank (for an empty project) or tabs (for a project with a tab navigation bar). Then, navigate to the project folder:
Run project:
This command will start Metro Bundler and display a QR code in the terminal.
View the app on your phone: Open the Expo Go app on your phone, select "Scan QR Code" and scan the QR code in the terminal. Your app will download and run on your phone. It's that simple!
This process is more complicated and requires configuration for each operating system.
General requirements:
Install Node.js (LTS version).
Install Watchman (recommended for macOS).
Install for Android (on Windows/macOS/Linux):
Install Java Development Kit (JDK).
Install Android Studio .
In Android Studio, go to SDK Manager and install the required Android SDK Platform.
Configure the ANDROID_HOME environment variable.
Create and launch an Android virtual machine (AVD) from Android Studio.
Install for iOS (macOS only):
Install Xcode from the App Store.
Install Command Line Tools in Xcode.
Install CocoaPods.
Create and run the project:
Create new project:
Runs on Android:
Make sure your Android virtual machine is running or a physical device is connected. Then, run the command:
Runs on iOS (macOS only):
Make sure your iOS virtual machine is running. Then, run the command:
The first build may take a while. Once it is successful, you will see the default React Native app running in the virtual machine.
Summary: This section will dive into the building blocks of every React Native app. You'll understand the nature of Components, Props, and State, how they work together, how to style your interface effectively, and how to handle user events and complex navigation within your app.
Like ReactJS, everything in React Native is a Component . A component is a self-contained, reusable piece of UI. You can think of every screen, every button, every input field as a component.
Components: Are JavaScript functions (Functional Components) or classes (Class Components) that return React elements to describe what the interface should look like.
Props (Properties): A way to pass data from a parent component to a child component. Props are read-only objects, meaning that the child component cannot change the props it receives. In the example above, title is a prop.
State: Is data that a component manages itself and can change over time. When the state changes, the component will automatically re-render to update the interface. In Functional Components, we use the useState hook to manage state.
In React Native, you don’t use CSS. Instead, you style using JavaScript. The most common approach is to use StyleSheet.create to define styles and apply them to the component’s style property.
StyleSheet: Helps optimize performance and create cleaner code.
Flexbox: This is the main layout engine in React Native. If you’re familiar with Flexbox on the web, you’ll feel right at home. It allows you to arrange elements flexibly and easily create complex interfaces that adapt to multiple screen sizes.
Mobile apps need to interact with users. React Native provides a powerful event system.
Touches: Components like TouchableOpacity , TouchableHighlight , Pressable allow you to handle touch events, long presses, etc., through props like onPress , onLongPress .
Text Input: The component allows the user to enter text. You use the onChangeText prop to catch the text change event and update the state accordingly.
BackHandler: This is an Android-specific API that allows you to listen for and customize the behavior when the user presses the physical "Back" button. You can use it to display a confirmation dialog before exiting the app or to go back to the previous screen in a complex flow.
Most apps have more than one screen. Managing the flow between screens is called navigation. The most popular and recommended library is React Navigation .
NavigationContainer: Is the root component that should wrap the entire navigation structure of the application. It manages the navigation tree and contains the navigation state.
Navigators: React Navigation provides different types of navigators to create different flows:
Stack Navigator: Screens are stacked on top of each other. When you go to a new screen, it is placed on top. When you go back, it is removed. This is the most common type.
Tab Navigator: Displays a tab bar at the bottom or top of the screen, allowing switching between different screens. createMaterialTopTabNavigator is an example, which creates a tab bar at the top of the screen, commonly seen in Android applications.
Drawer Navigator: Displays a menu that slides out from the edge of the screen.
Combining these navigators allows you to build complex navigation flows that meet most modern application requirements.
Explore how to extend the capabilities of your application. This section will guide you through how to efficiently store data locally with AsyncStorage, interact with device hardware through libraries like BLEManager, build complex features like chat interfaces, and integrate external services like the VNPAY payment gateway.
When you need to store simple data and persist it even when the user closes the app (e.g. saving login tokens, user settings, app state), AsyncStorage is the tool for you. It is an unencrypted, asynchronous key-value storage system that works on both iOS and Android.
It works like localStorage on the web but is completely asynchronous, meaning read/write operations return a Promise .
Setting:
Usage example:
The real power of mobile apps lies in their ability to interact with hardware and operating system services. React Native, through a rich library ecosystem, allows you to do this easily.
Bluetooth Low Energy (BLE): To work with BLE devices (like smartwatches, medical devices), you can use libraries like react-native-ble-manager ( BLEManager ). This library provides functions to scan, connect, read, and write data to BLE devices.
Camera & Photo Library: Libraries like react-native-vision-camera or react-native-image-picker allow you to access the device's camera to take photos, record videos, or select photos/videos from the user's library.
Location (Geolocation): The react-native-geolocation-service library provides access to the device's GPS location, useful for mapping, delivery, or check-in applications.
Building a chat interface from scratch can be a daunting task. Luckily, the community has created GiftedChat , a powerful and easy-to-use library that helps you create a fully featured chat interface in just minutes.
GiftedChat provides components for:
Chat bubble
Show avatar
Auto resizing input field
Send pictures, videos
"load more messages" feature
...and more.
You just need to provide the message data in a specific format, and GiftedChat will take care of the rest.
Payment integration is a common requirement for e-commerce or service applications. To integrate a payment gateway like VNPAY in React Native, the general process usually includes the following steps:
Install library: Find and install VNPAY support library for React Native (if available) or use WebView to display VNPAY payment page.
Create payment request: From the application, you send order information (amount, order code,...) to your server.
Server generates payment URL: Your server will use VNPAY's SDK to generate a unique payment URL and return it to the application.
Show payment page: React Native app opens this URL in a WebView . User will enter payment information on VNPAY interface.
Result processing: After the user completes the payment, VNPAY will redirect to a return URL that you have configured. The application will listen to the change of the URL in the WebView to know if the transaction is successful or failed and update the interface accordingly.
Equip yourself with the knowledge and confidence you need before your interview. This collection of react native interview questions is clearly categorized from fundamental knowledge, core theory, to real-world scenarios and in-depth performance optimization questions, helping you prepare in the most comprehensive way.
These are questions to test whether you have a solid grasp of the fundamental concepts.
What is React Native? How does it work?
Suggested answer: Emphasize it is a cross-platform framework, using JavaScript and React. Explain Bridge mechanism, difference between JS Thread and Native Thread.
Comparing React Native vs Flutter and Native Programming.
Suggested answer: Mention language (JS vs Dart), architecture (Bridge vs Skia), performance, and pros/cons in terms of development time/cost.
What is the difference between ReactJS and React Native?
Suggested answer: Focus on the intended use (web vs mobile) and the primitive components ( div / span vs View / Text ).
How are Props and State different in React Native?
Suggested answer: Props are used to pass data from parent to child, they are immutable. State is the internal data of the component, can change and when changed will trigger re-render.
How does Flexbox work in React Native? Name some important properties.
Suggested answer: Explain that Flexbox is the main layout mechanism. Important properties: flexDirection (default is column ), justifyContent , alignItems , flex .
What is the difference between FlatList and ScrollView? When to use FlatList ?
Suggested answer: ScrollView renders all child elements at once, suitable for short lists. FlatList uses "lazy loading" mechanism (only renders items visible on the screen), which helps optimize memory and performance for long lists.
These questions assess your problem-solving abilities and practical work experience.
Would you choose Expo or React Native CLI for a new project? Why?
Suggested answer: Analyze based on project requirements. If the project needs to be fast, simple, and doesn't require much native intervention, choose Expo. If the project is complex, requires high performance, and integrates many native libraries, choose CLI.
How to manage state for a large React Native app?
Suggested answer: Mention solutions like Redux (Redux Toolkit), MobX, or React Context. Explain the pros/cons of each and why you would choose a particular solution for a large project.
What performance issues have you encountered in React Native and how did you solve them?
Suggested answer: Give specific examples such as long lists being laggy (solved by optimizing FlatList ), unnecessary re-rendering (solved by useMemo , useCallback , React.memo ), or Bridge being overloaded.
How to handle different versions of the interface for iOS and Android?
Suggested answer: Refer to using the Platform API ( Platform.OS === 'ios' ), creating separate files (e.g. MyComponent.ios.js and MyComponent.android.js ), or using UI libraries that provide components for both platforms.
Describe the process of debugging your React Native application.
Suggested answer: Mention tools like Chrome DevTools, React Native Debugger, Flipper, and how you use console.log to monitor data flow.
These are questions for Senior positions, testing in-depth knowledge.
What is Bridge in React Native and what are its limitations? How does the new architecture (JSI - JavaScript Interface) improve this?
Suggested answer: Explain that Bridge is asynchronous and relies on JSON serialization, which can cause bottlenecks. JSI allows JavaScript to directly call native functions synchronously, reducing latency and significantly increasing performance.
What is Hermes? Why should we use it?
Suggested answer: Hermes is a JavaScript engine optimized for React Native. It helps reduce app startup time, reduce memory usage, and reduce APK file size.
What are useMemo and useCallback used for? When would you use them?
Suggested answer: useMemo is used to "memoize" the value of a complex calculation. useCallback is used to "memoize" a function. Both help avoid unnecessary recalculation or re-creation of the function on each re-render, thereby optimizing performance, especially when passing them down to child components wrapped by React.memo .
Is code splitting possible in React Native?
Suggested answer: Unlike web, traditional code splitting does not apply directly. However, techniques like "inline requires" can be used to delay loading modules until they are actually needed, which can improve startup time.
To help you on your way to becoming a professional React Native developer, this section provides a curated list of authoritative resources, reputable communities where you can learn and exchange, along with suggestions for quality online React Native courses, including both free and paid options.
These are the places you should visit first to get the most accurate and up-to-date knowledge.
Official React Native documentation: This is the original and most reliable source of documentation. All concepts, APIs, and installation instructions are detailed and always up to date with the latest version. Get into the habit of reading the original documentation, it's an important skill for a good programmer.
Expo's documentation page: If you choose to go the Expo route, this is a must-have companion. It provides detailed documentation on the Expo SDK, command line tools, and workflows with Expo.
React Native GitHub: Following the official source code repository on GitHub helps you stay on top of upcoming changes, issues being discussed, and community contributions.
Viblo Community: Viblo is one of the largest IT knowledge sharing communities in Vietnam. You can find countless articles, react native tutorials, and in-depth analysis of React Native from experienced programmers.
Foreign technology blogs: Sites like Dev.to, Medium, LogRocket regularly have high-quality articles about new techniques, libraries and real-life case studies about React Native.
If you prefer to learn in a structured way and with video tutorials, online courses are a great option.
Free Course:
"The Net Ninja" YouTube Channel: Provides a series of React Native tutorials that are very intuitive and easy to understand, suitable for beginners.
"Code with Mosh" YouTube Channel: Mosh Hamedani has high quality basic React Native tutorial videos.
F8 Platform (Fullstack.edu.vn): Provides free programming courses in Vietnamese, including ReactJS and React Native, with a structured roadmap and strong community support.
Paid Courses (High Quality):
Udemy Courses: This platform has a wide range of React Native courses from beginner to advanced level by renowned instructors like Stephen Grider, Maximilian Schwarzmüller. These courses are usually comprehensive, include real-world projects, and are updated regularly. Look for discounts to get the course at a reasonable cost.
In-depth platforms like Frontend Masters: Offers in-depth courses on advanced aspects of React and React Native, taught by industry-leading experts. Great if you have a solid foundation and want to advance your skills.
![]()
![]()
![]()
![]()